
Live Binding Development Model
With Live Binding development model of QuickOPC, no manual coding is necessary to achieve OPC client connectivity. You simply use the Visual Studio Designer to configure bindings between properties of visual or non-visual components, and OPC data. All functionality for OPC reads, writes, subscriptions etc. is provided by the QuickOPC components. You can go "online" at any time, and observe the changing OPC data on the screen.
An important aspect of the OPC client live binding model is that it is not limited to or associated with any particular set of UI controls. It works by extending the features of existing controls, and providing functionality on top of what the controls already do. Live binding works well with standard Microsoft controls, but also works with controls from other vendors. This approach gives the live binding an enormous power, because you can combine the advanced features of free or commercial controls with the OPC connectivity.
Live Binding supports Windows Forms applications.
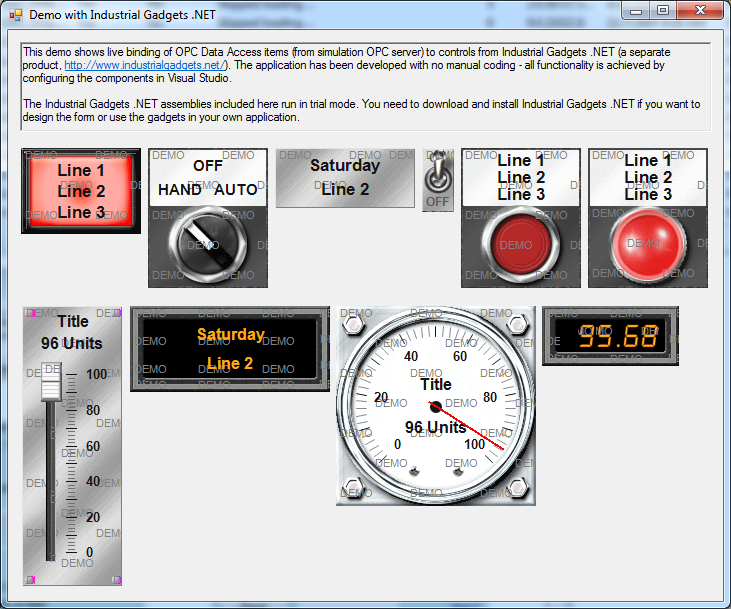
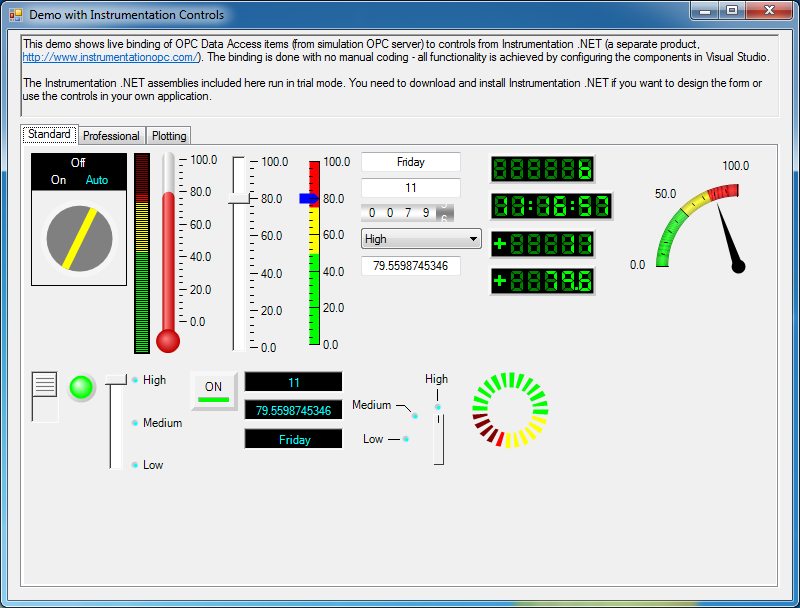
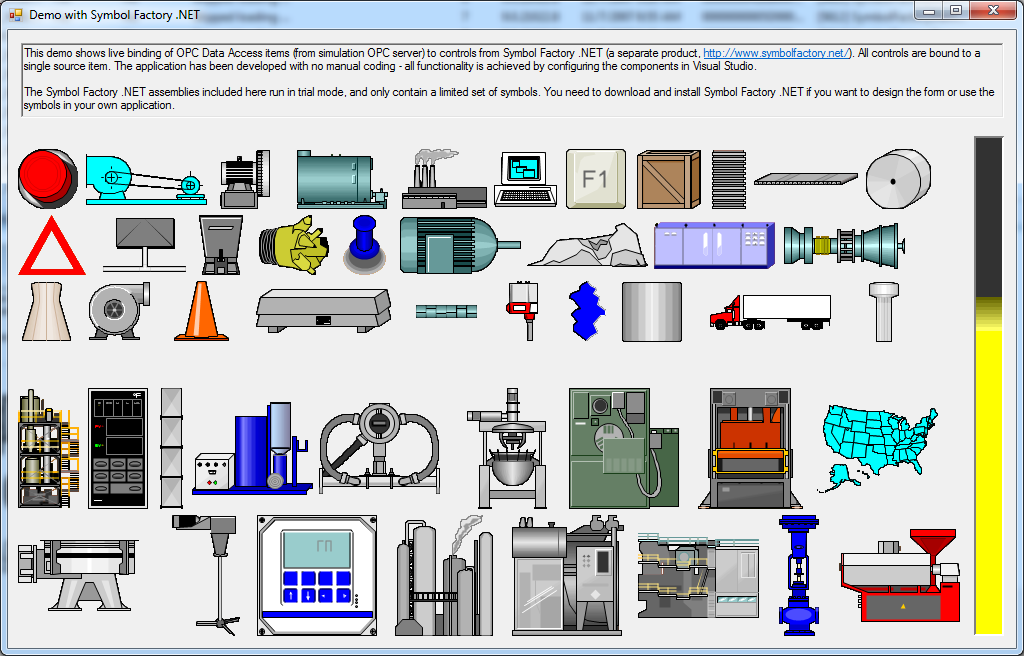
In the examples installed with the product, we provide a demonstration of the integration capability described above. There are demos that show how Live Binding can be used with several 3rd party products, some aimed directly at industrial automation area.
Useful links: Documentation / Knowledge Base
Example Screens
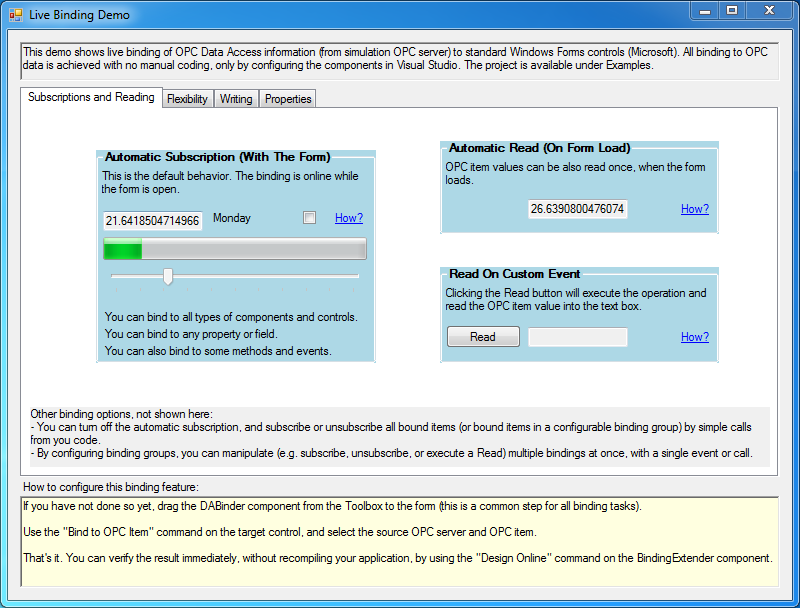
Following screens (click a picture below to enlarge) are taken from examples that are installed with QuickOPC. The demos show live binding of OPC Unified Architecture and OPC Data Access items to standard Microsoft controls, and to controls from 3rd-party products.
The applications have been developed with no manual coding - all functionality is achieved simply by configuring the components in Visual Studio. You can even monitor the OPC data online while you are developing your screens, without having to rebuild your application.
Live Binding Features
Live Binding works with OPC Unified Architecture and OPC Data Access ("Classic") servers.
- You can bind to any OPC item, node attribute or property.
- You can bind .NET object properties, methods, and even sub-members. Members of extender components (such as ToolTip or ErrorProvider) can be bound, too!
- Works with subscriptions, but also one-time reads and writes.
- Bindings can be grouped for easier configuration and control.
- You can convert and format the values in various ways.
- Design just by dragging components from Toolbox and configuring them.
- Work with array elements using the element extraction feature, and built-in read-modify-write algorithm.
- Different binding kinds such as Value, Quality, Timestamps, ErrorMessage, and many more.
- Use cumulative binding to add new entries to controls like ListBox and ListView.
Live Binding Quick Start
Let's create a Windows Forms application in C# or Visual Basic that subscribes to OPC item and continuously displays it changes. The live binding model allows to achieve this functionality by simply configuring the QuickOPC components, without any manual coding.
- Install QuickOPC.
- Start Microsoft Visual Studio, and create new Visual C# or Visual Basic project, selecting "Windows Forms Application" template.
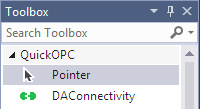
- Drag the DAConnectivity component from the "QuickOPC" tab of the Toolbox to the form’s design surface.
Notice that three icons will appear below the form: One labeled “daConnectivity1”, the second labeled “pointBinder1”, and the third labeled “bindingExtender1”.
- Drag a standard TextBox from the Toolbox to the form.
- Right-click on the text box control on the form, and choose "Bind to Point" command.

Alternatively, you can select the text box control first, and then choose the "Bind to Point" command in the Properties windows; for this to work, however, the commands must be displayed in the Properties windows.
If you do not see these commands, display them by right-clicking in the Properties window, and checking "Commands" in the menu.
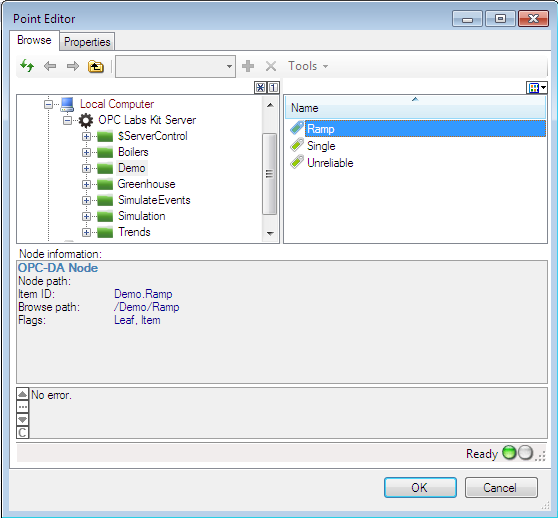
- In the "Point Editor" dialog, select Computers -> Local -> OPC Labs Kit Server -> Demo -> Ramp, and press OK.
- Build and run your application. You will see live OPC data changing in the text box. It is also possible to verify the effects of live binding without building the application: On the bindingExtender component placed on the form, select the "Design Online" command. This will cause Visual Studio to perform the live binding immediately. Use the "Design Offline" command to revert back to normal mode.
You have now configured the dynamic display of live OPC data item, with no coding!